![]()
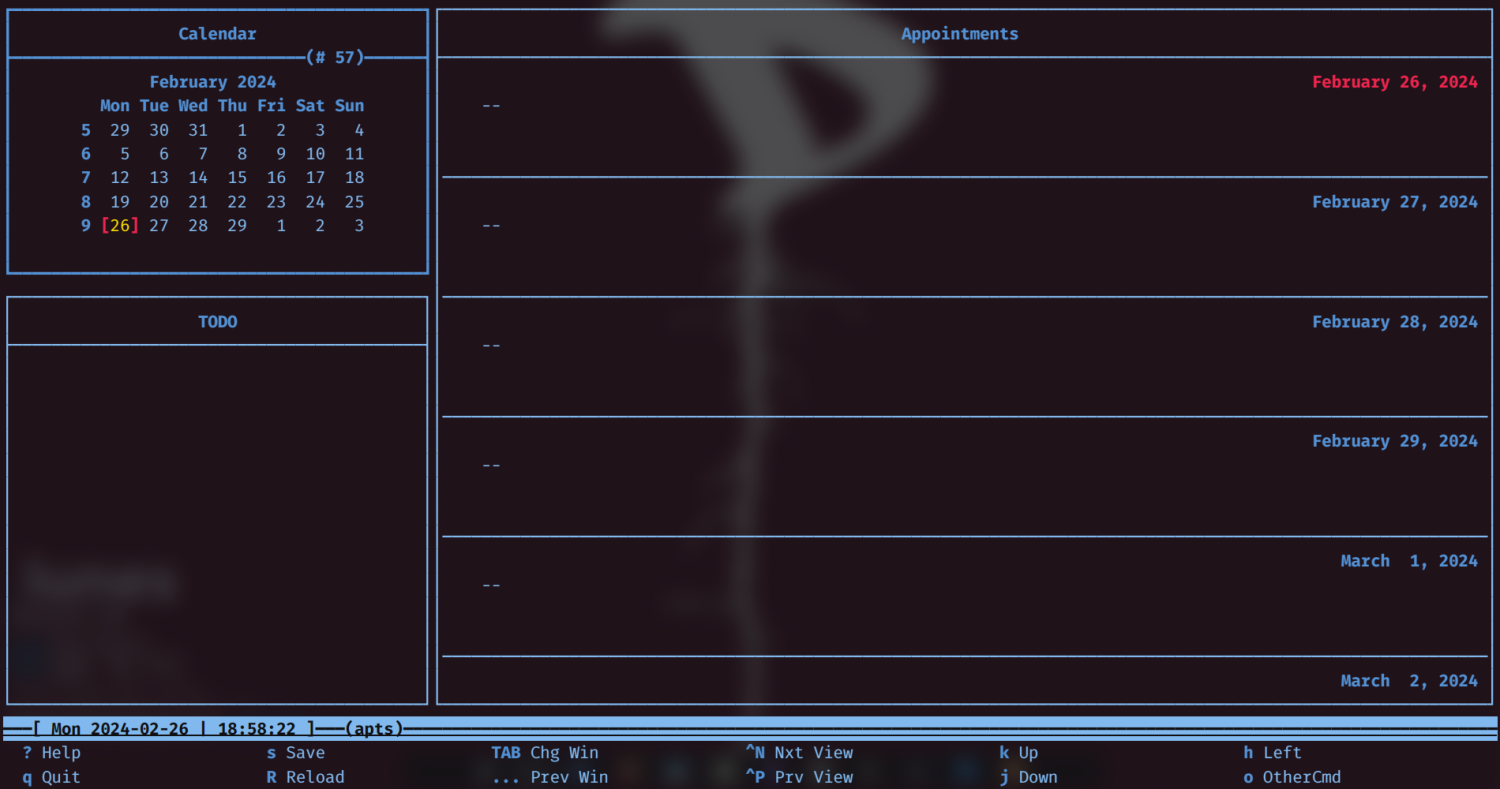
calcurse is a calendar and scheduling application for the command line. It helps keeping track of events, appointments and everyday tasks.
Things to keep in mind before we start
- We need to have installed a C compiler, such as cc or gcc, and the ncurses library. It is almost certain we already have them if we are using a GNU/Linux distro.
- Since CalDAV support is still experimental, it is highly recommended making backups, especially before the initial setup.
- If we already use calcurse locally, we may want to back up the content of the configuration files and database(s) typically located at
~/.calcurse/caldav/(where~is our home directory).
To learn how to export (back up) our calendar, we can check this section of the Calendar app how-to.
Installing calcurse
Most common way to install it is manually, but we can check at the calcurse download page if this also can be done from our GNU/Linux distribution software manager.
Manual installation
Download and untar the source archive:
$ tar zxvf calcurse-4.3.0.tar.gz
The installation process is quite simple, and follows the standard three steps process:
$ ./configure
$ make
$ make install (this last step may requiere root privileges)
Once installed we just type calcurse in the terminal and it will open.
Creating a configuration file
If it is the first time we use calcurse we need to create a configuration file. We browse from the terminal to the caldav directory at ~/.calcurse/caldav/ and create a new file with the name config.
Now there are two ways to complete our configuration file.
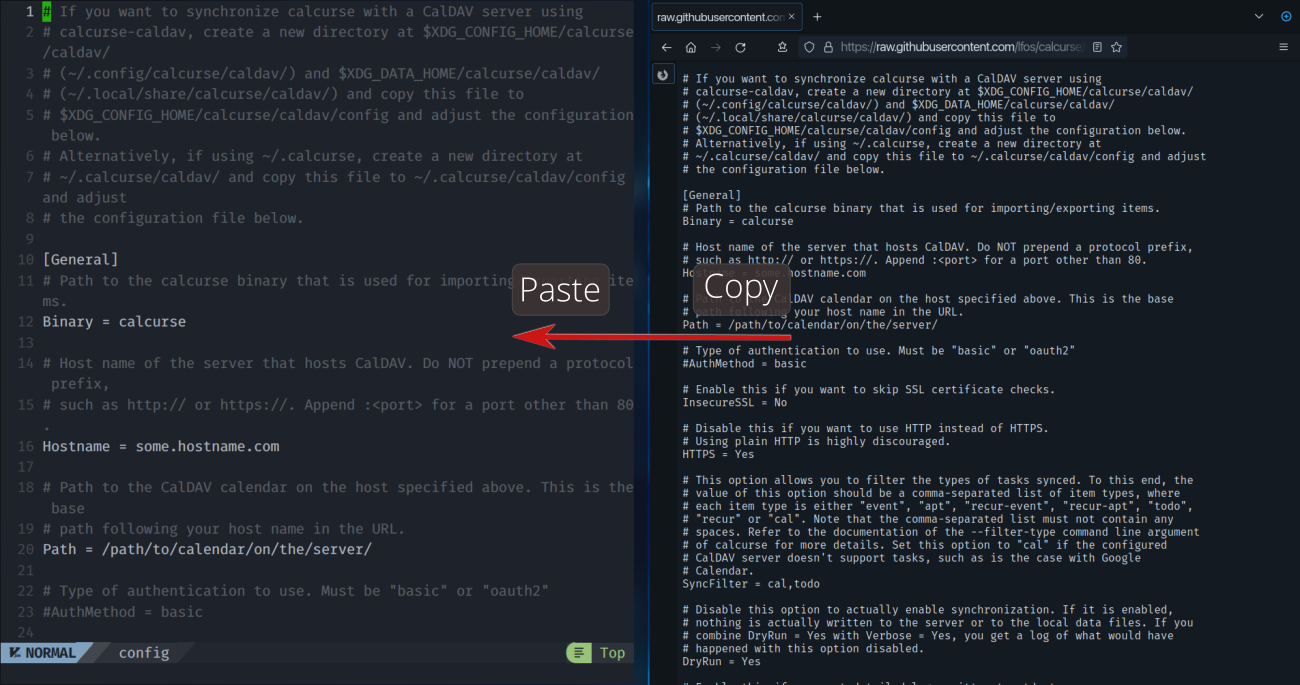
- To copy and paste the contents of this sample config file into our own.
- Via curl in the caldav folder using the following commands (the latter will overwrite our
configfile if it already exists in~/.calcurse/caldav/):
curl https://raw.githubusercontent.com/lfos/calcurse/master/contrib/caldav/config.sample > ~/.calcurse/caldav/config
Next, we need to open the config file with our text editor of choice and find the following lines:
# Host name of the server that hosts CalDAV.
Hostname = some.hostname.com

# Path to the CalDAV calendar on the host specified above.
Path = /path/to/calendar/on/the/server/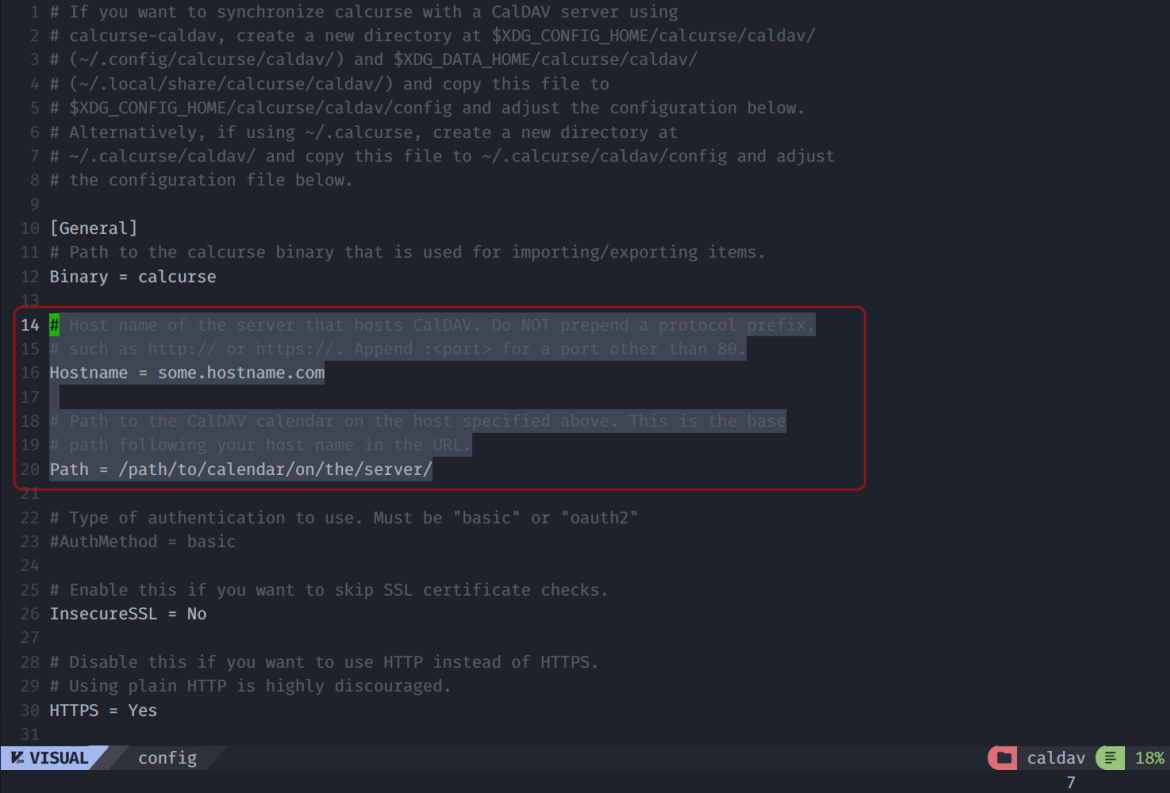
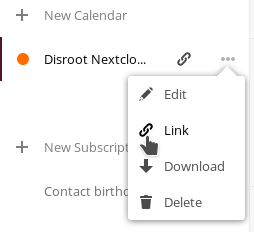
We have to replace the host name with cloud.disroot.org and the path with remote.php/dav/calendars/username/calendar-id/. You can find out what the exact path is by logging into your Nextcloud account, opening the calendar app, and, on the left sidebar, clicking on the three dots next to the calendar name and then "Link". Now, you should be able to see and copy a hyperlink that looks like https://cloud.disroot.org/remote.php/dav/calendars/username/calendar-id/.
Inside config, there's also the following line:
DryRun = YesThis is for safety measures so that you can test your configuration before actually syncing your calendar. Let's leave it as it is for now; we'll return to it soon.
Now, find the following lines:
#[Auth]
#Username = user
#Password = pass
Uncomment the first two lines (including the header [Auth]), i.e. remove the # sign from the beginning of each line, and replace "user" with your actual username.
Multiple ways of handling your password
One way of providing your password is uncomment the line for the password and replacing "pass" with your password in the config file. Although this is convenient as you only need to do it once, anyone who has access to your home folder can normally see what your password is.
For this reason, the official documentation mentions using a password manager together with the CALCURSE_CALDAV_PASSWORD variable each time you start the synchronization process as an alternative. In the case of pass, this would be something like:
CALCURSE_CALDAV_PASSWORD=$(pass show disroot) calcurse-caldavIf you use KeepassXC, you would do the same with the command below:
CALCURSE_CALDAV_PASSWORD=$(keepassxc-cli show mydatabase.kdbx Disroot -k supersecretkeyfile.png -a Password) calcurse-caldavTesting your configuration
For syncing for the first time, you need to issue the command calcurse-caldav together with one of the following arguments:
--init=keep-remote # Remove all local calcurse items and import remote objects
--init=keep-local  # Remove all remote objects and push local calcurse items
--init=two-way     # Copy local objects to the CalDAV server and vice versa
In other words, if, for instance, you want to import your calendar from Nextcloud to calcurse without making any changes on Nextcloud for the first time, use calcurse-caldav --init=keep-remote.
If there are no error messages, go back to your config file and change the value of DryRun to No, and run the above command again. For any subsequent sync requests, calcurse-caldav (optionally with the CALCURSE_CALDAV_PASSWORD variable, as mentioned earlier) will be enough.
And that's it! If everything went well, you should have synchronization set up between your Nextcloud calendar and calcurse through CalDAV.
