Files
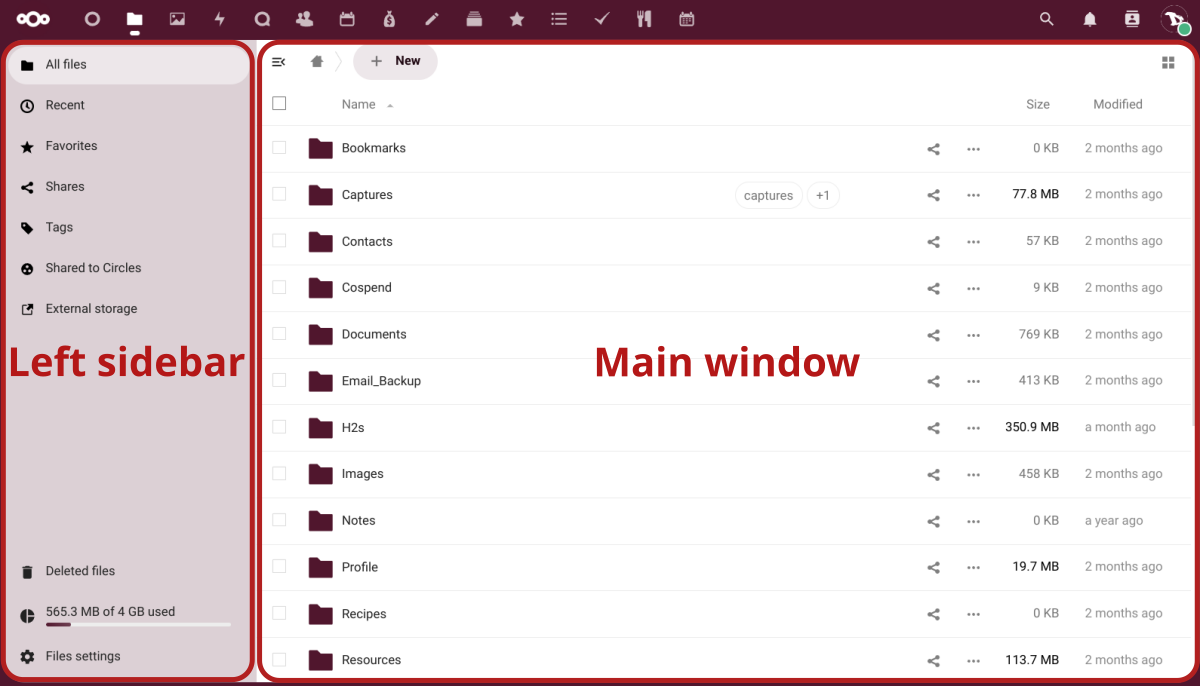
The main task of Nextcloud is file management. Below is an overview of the main window, which we will divide in two sections:
-
The left sidebar let's us filter files based on certain criteria (recents, favorites, shared, by tags, shared with circles or from external storages).
-
The main window is our file-browser and workspace. In addition to information about our files, from here we can perform a number of operations, such as commenting, tagging or sharing them.
At the top of the main window we have four general options:

-
- The open/close navigation button (we already saw it in a previous chapter).
-
- The home button, which leads us back to the root folder (the home folder) when we navigate through our files or folders.
-
- The New button which allows us not only to upload a file or create new folders, but also text files, pads, add descriptions and set a folder as a templates directory. We click on it and choose an action from the list.
-
- The grid view button, to toggle between the list and the grid view of our files and folders.
At the bottom of the left sidebar we can:
- access our Deleted files (if any). When we delete a file or folder, these go to this kind of trash bin where we can recover them or delete them definitively;
- check our storage quota;
-
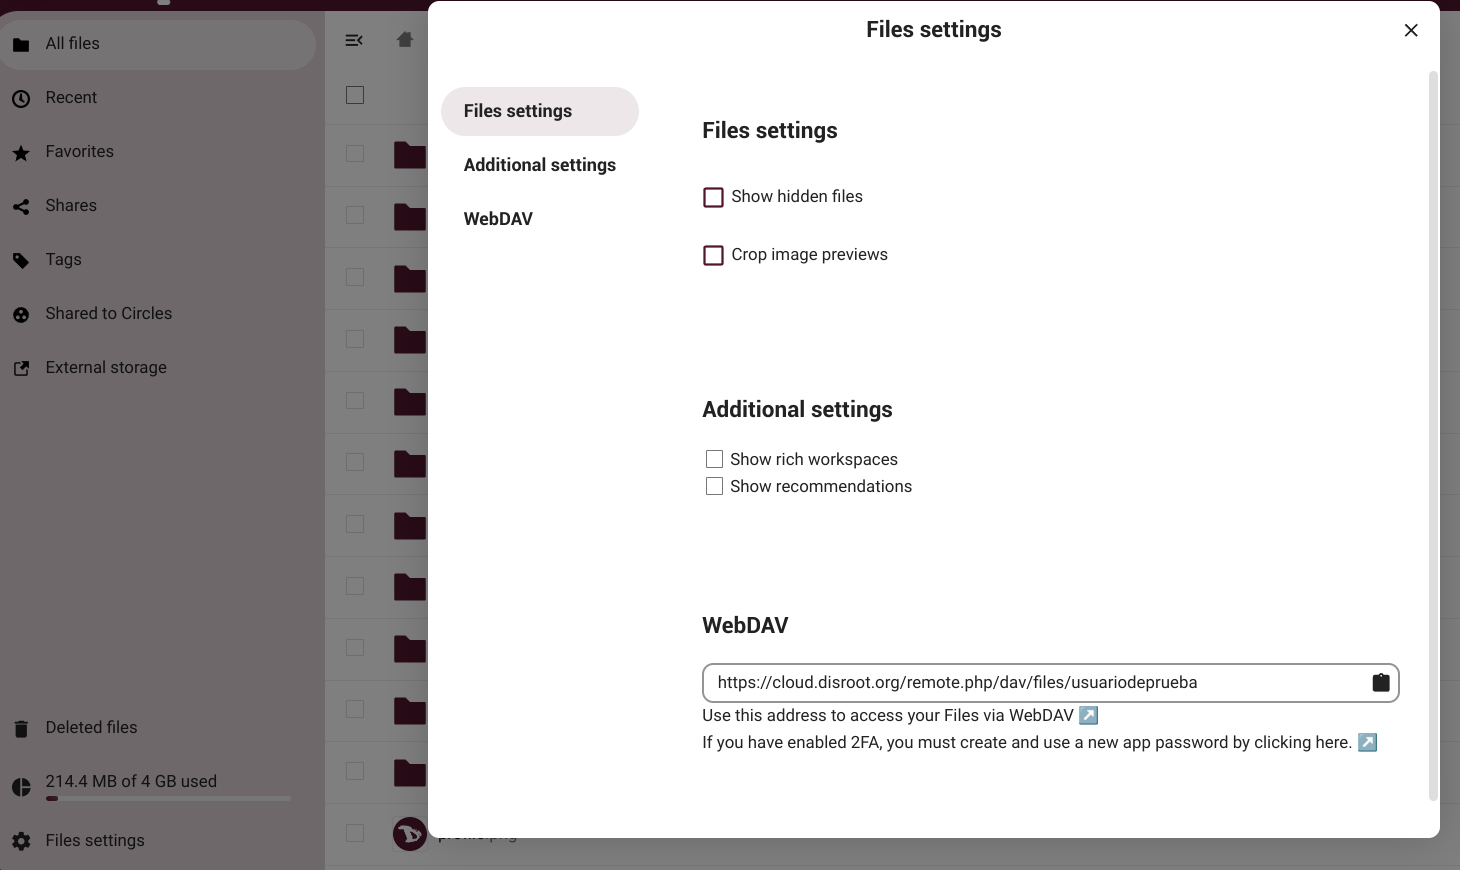
and open our Files settings, where we can set to show or not hidden files, to crop image previews and to show rich workspaces and recommendations. Additionally, here we can copy our WebDAV address to remotely access our files.
Files management
File management within the cloud is similar to how we would do it on our computer, with the advantage of being able to perform a lot more operations, especially those related to the collective management of files that would otherwise be more laborious.
Next we will look at the basic operations of file management in the cloud.
Uploading files
We have already seen that from the "New" button we can create folders, and create or upload files. But we can also upload them directly by dragging them from our desktop computer to the files main window.
Sharing files
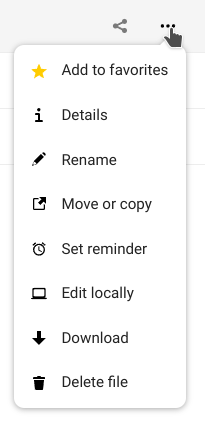
By clicking on the "three dots" icon next to the filename or directory we access the main actions we can perform on a given file or folder.
The first one we are going to learn is Details. This is because Sharing is one of the core features of the cloud and it is also the default tab/option that is displayed first when opening Details where we have another set of options.
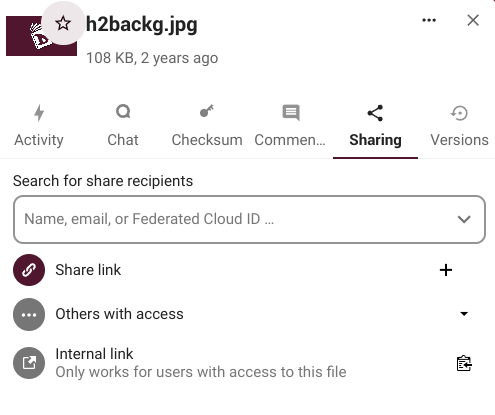
Share link
We can share a file or folder in several ways. The first one we will see is through a link.
-
Clicking on the + (plus) icon will generate a link.
-
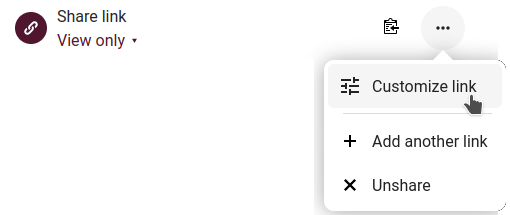
Once the link is created, we can set it to:
- View only: to allow viewing and downloading but not editing;
- Can edit: to allow other people edit what was shared;
- File drop (in case of folders): to allow uploading files only to a folder without seeing the files that are already in that folder.
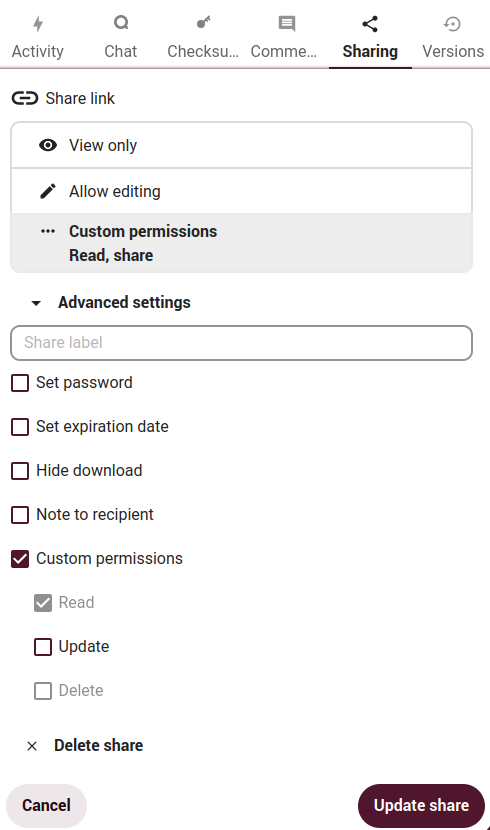
- Custom permissions:
- Read: set as default in case of files.
- Create (in case of folders): to allow creating files and folders within the shared folder.
- Update: to allow updating the file/folder content.
- Delete: to allow deletion of a file/folder.
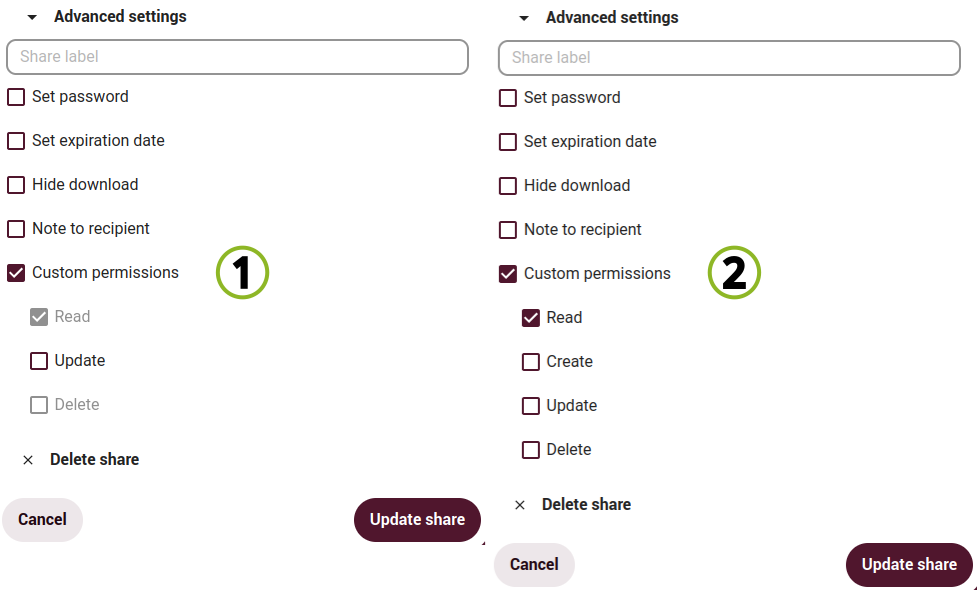 1: file's custom permissions. 2: folder's custom permissions
 -
Access more customizations of the link by clicking on the three-dots icon on the right and select Customize link. We can also Add another link, to create multiple links with different rights, or Unshare it, both from this menu.
Here we can see and set permissions and also:
- Set password for the link we are sharing;
- Set expiration date after which the shared item becomes inaccessible;
- Hide download to disable downloading option;
- Note to recipient to send a comment to the person or persons who will receive the link.
Internal share
Another way of sharing a file or folder is via an internal link we can share with other users, groups, circles or people in a Talk conversation.
Type the name, email or Federated Cloud ID of the person with whom we are going to share the file/folder in the search field. When we find it, we select it and check the permissions we want to grant.
Just as when we share a link, we can adjust the permissions and options from the drop-down menu under the user name or from the three dots icon on the right.
Other with access
This option allows to find out if a file or folder is accessible to other people through a shared folder at a higher hierarchical level.
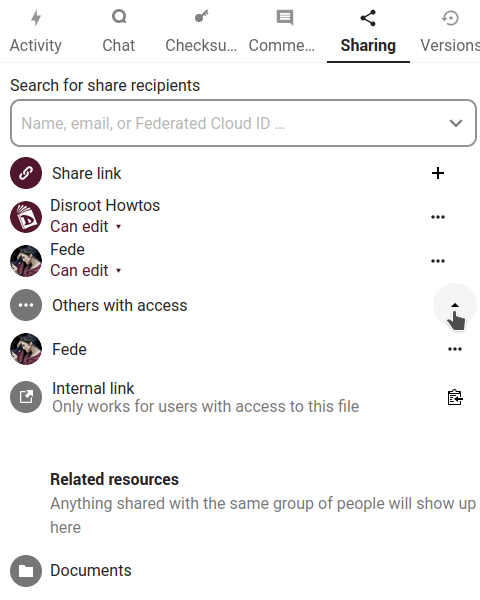
The list shows all users, groups, chats, etc., that a given item has been given access to through sharing of a superior folder in the hierarchy.
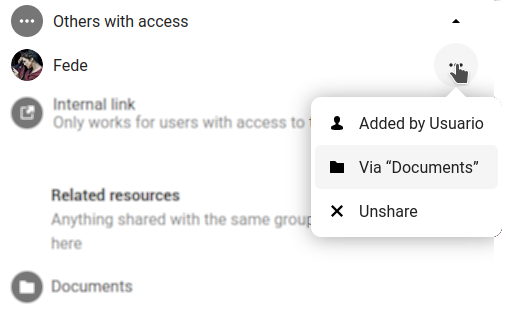
Clicking on the three-dots menu we can
- see who initiated the share;
- see where the share was initiated (we can click to navigate to the folder, as far as we have access there);
- and unshare the initial share (share owner only)
Internal link
An internal link will only works for users who already have access to the file or folder. We just click on the clipboard icon to copy the link and share it.

Other share options
In this same Details panel there are other options we can access from the three-dot menu to the right of a file or folder.

-
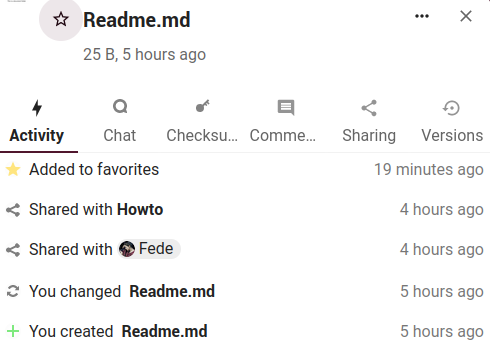
Activity: here we can see a log of all the operations performed on a file or folder.
-
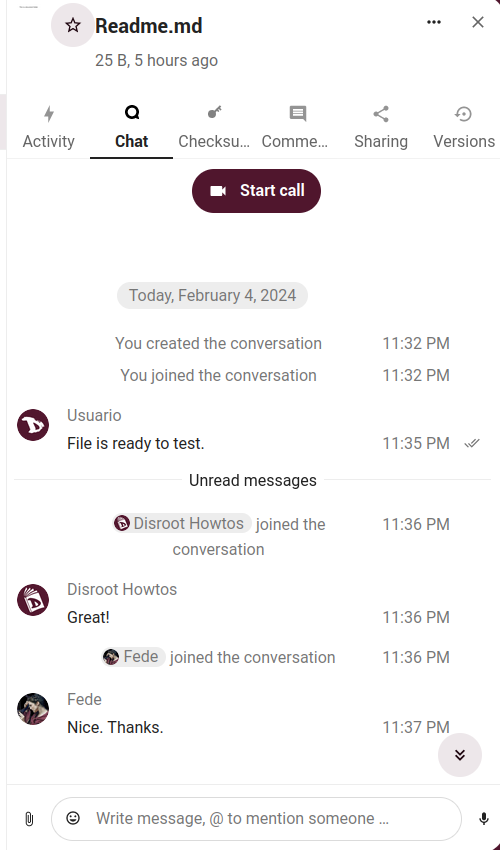
Chat: we can start a conversation or a call with the people to whom we share a file or folder.
-
Checksum: it is a mathematical function whose main objective is to detect changes (accidental or malicious) in a data transmission in order to protect the integrity of the information. A checksum is intended to protect three fundamental aspects of the information exchanged between users: data integrity, authenticity of the origin and confidentiality of the information.
We simply select an algorithm, it will generate a checksum for a file, copy the generated value and share it along with the file. Whoever downloads it can verify the integrity of the data and check that it is the same file.

-
Comments: here we can add and read comments on any file or folder. Comments are visible to everyone who has access to the file.
-
Versions: this tab contains the changes history of a file or folder where we can roll back any of them to any previous version.
We can restore, rename, compare, download or delete a specific version of a file by clicking on the three-dots icon at the right and selecting an option.
Tags

We can assign tags to files. The Tags option is in the Details view, at the top right, we click on it to create or assign tags. Then type our tags. To enter more than one tag we press the return key after creating each tag. All tags are system tags, and are shared by all users on our Nextcloud server.
Let's see the rest of the options and actions we can do.
Other file operations
In addition to Details, the following options can be found in this same menu.
Add to favorites
By adding a file or folder to favorites, we can quickly find all of them with the Favorites filter on the left sidebar.
Rename
Click this option to change the name of a file or folder. If what we modify is shared, those with access will be notified of it.
Move or copy
We can copy or move any file or folder by clicking this option. We just select the target folder and click on the action.

We can also move a file or directory in the traditional way, by dragging and dropping them to the place we want.
Set reminder
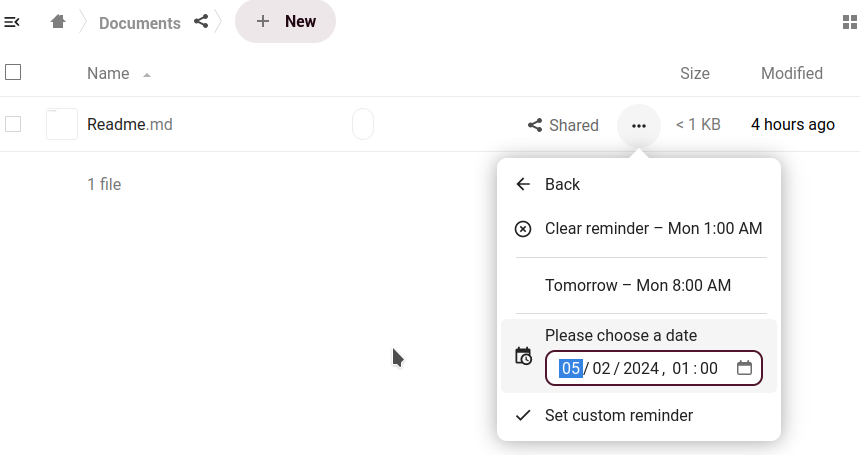
To remember something related to the file or folder we can set a reminder. Just click on this option and enter the date and time we want to be reminded.
Edit locally

By clicking on this option the browser will try to open the file with a program installed on our device to edit it.
Download

To download a file or zipped folder to our device.
Delete

To remove a file or folder. The files are not immediately deleted permanently, only moved into the trash bin. It is not permanently deleted until we manually do it, or when the Deleted Files app deletes it to make room for new files.
We can access our deleted files by clicking the Deleted files option in the left sidebar.
OK, so far we have seen the basics of the interface, personal settings and file management. Let's move on to the next chapters to learn about the rest of the cloud applications and functionalities.
