Nextcloud Mobile App
Nextcloud mobile app allows us to access and synchronize our Disroot cloud files from our mobile and download/upload/share/delete without having to use a browser or connect the device to a laptop to transfer files.
This app does not download the files to a local folder in our mobile, it simply shows the existing files in our cloud. The files are only downloaded if we select them for that purpose. This way it will not take too much space in our device. For uploaded files, we can keep a local copy in our mobile or not, it is our choice.
Installing the Nextcloud App
To install the app on Android, it is recommended that we install the F-droid app store. It is an installable catalogue of Free and Open Source software applications for the Android platform.

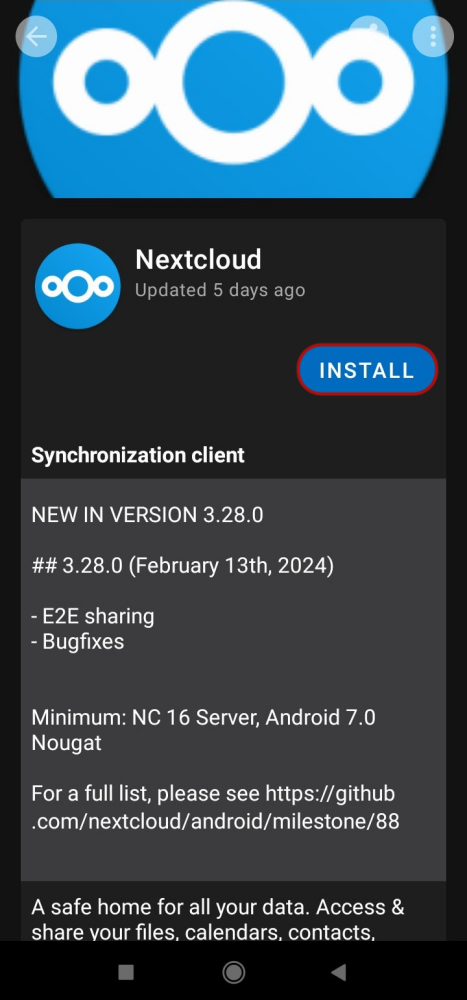
After we have installed and setup F-droid we can search and install the Nexcloud Mobile app...
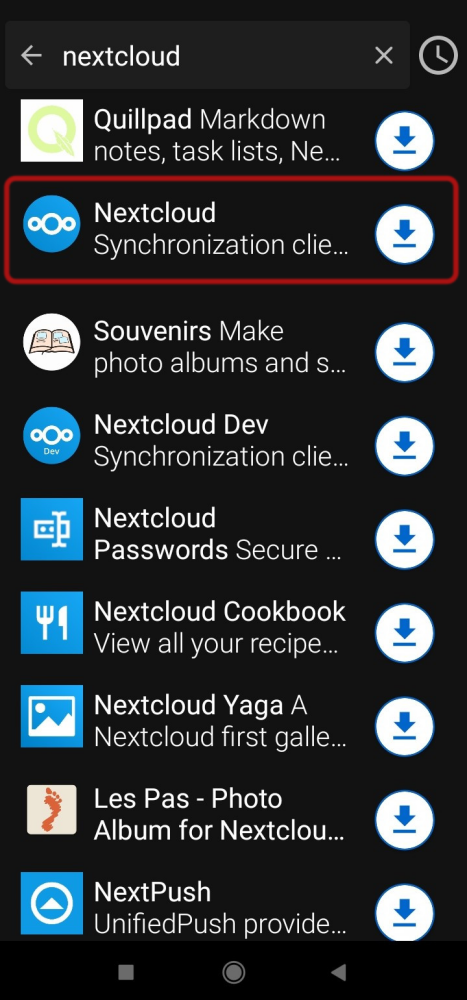
... and install it.
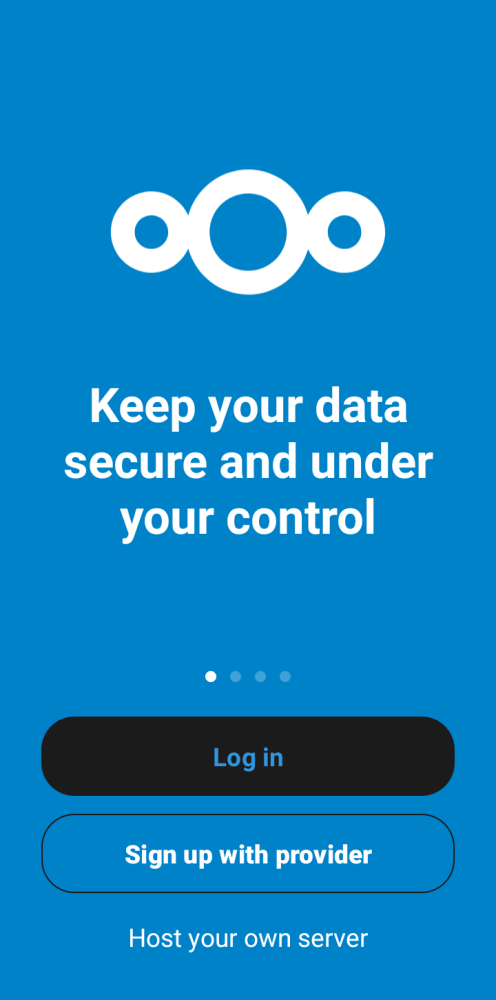
Setting up our Disroot account
Once the app is installed, we open it and tap Log in.
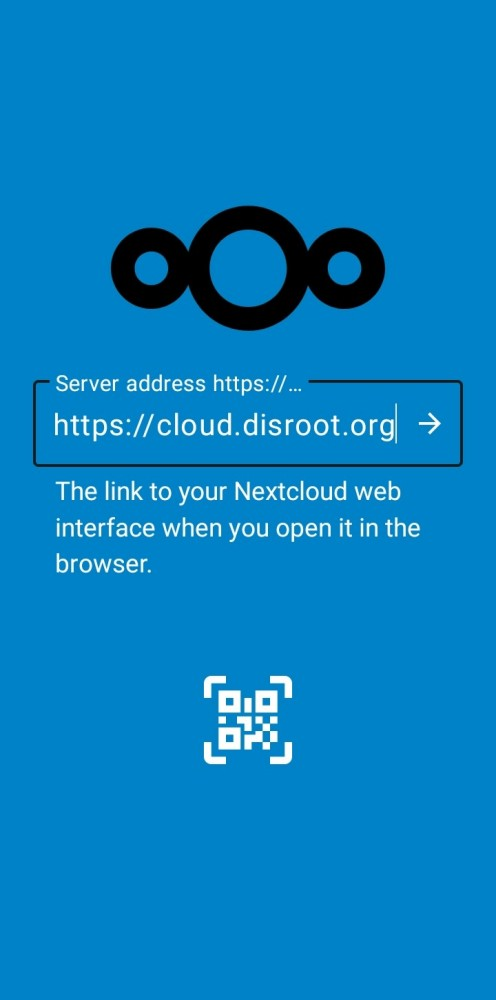
In the next screen we will be required to enter the server address. In our case it is:
https://cloud.disroot.org
Now the app will ask us to log in to our cloud account to grant permission to the device to connect to it.
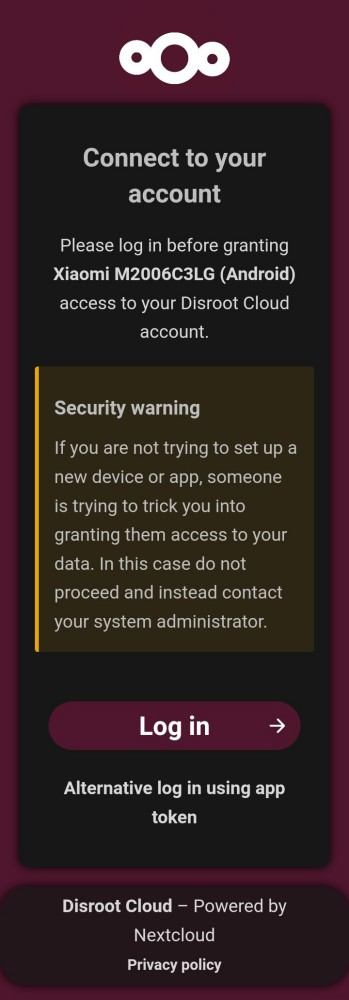
Tap on Log in.
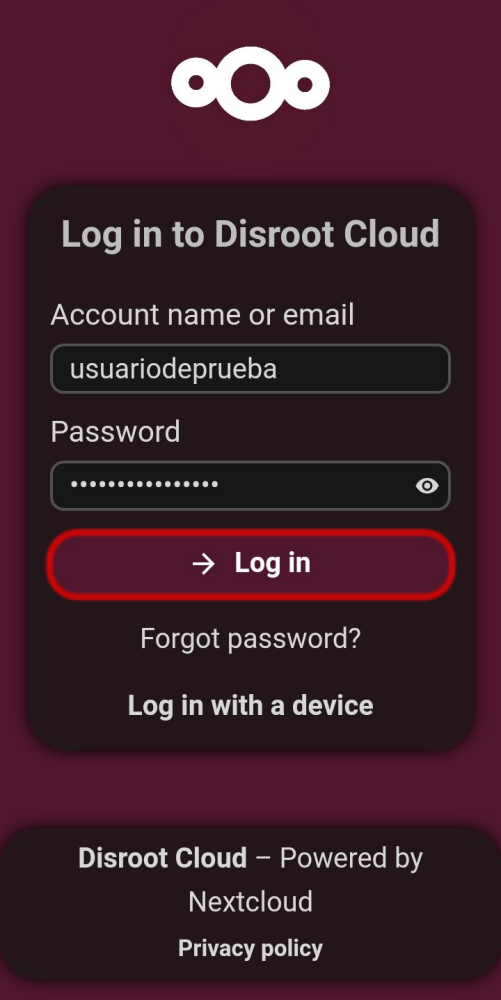
Then we enter our Disroot username and password and again tap on Log in
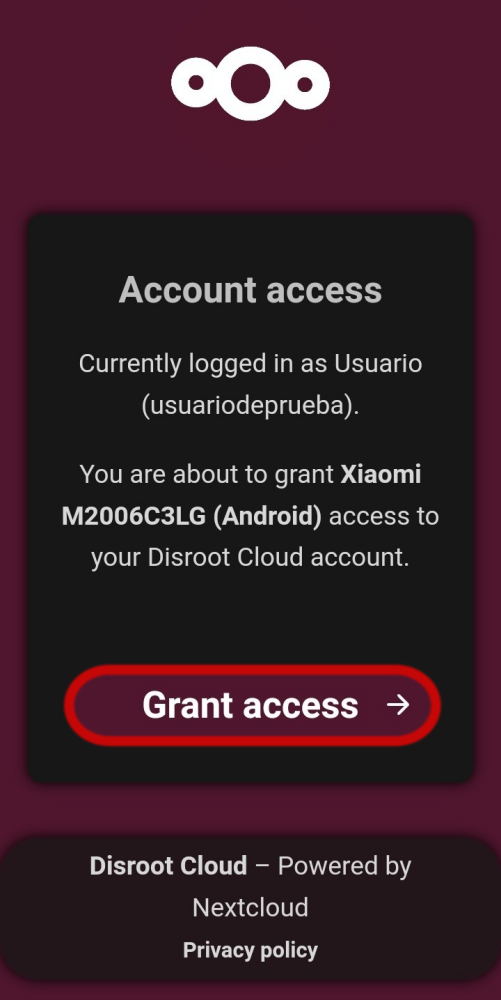
Finally, the app will notify us that we are about to grant permissions to the device and we can do so by tapping on Grant access button.
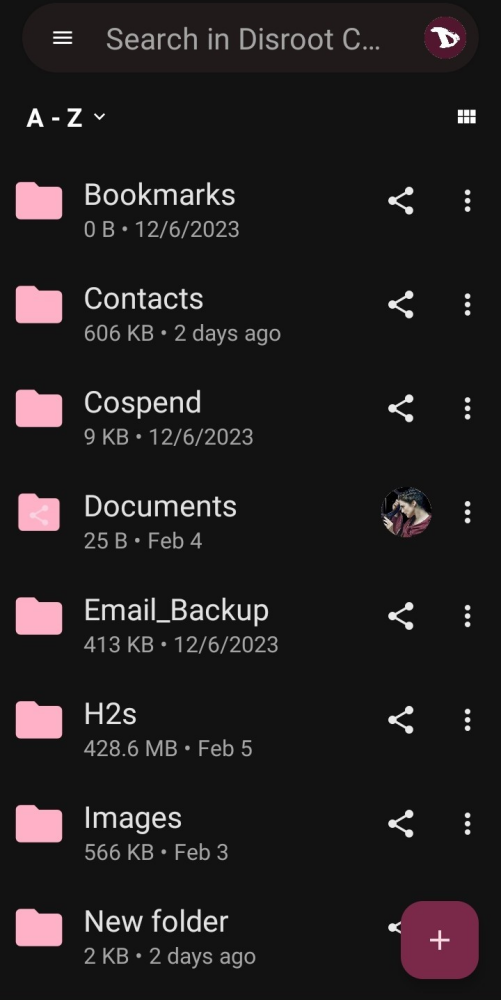
Done. Now will we see our cloud folders and files from the Nextcloud app.
Nexcloud App interface
The interface is pretty straightforward and easy to use.
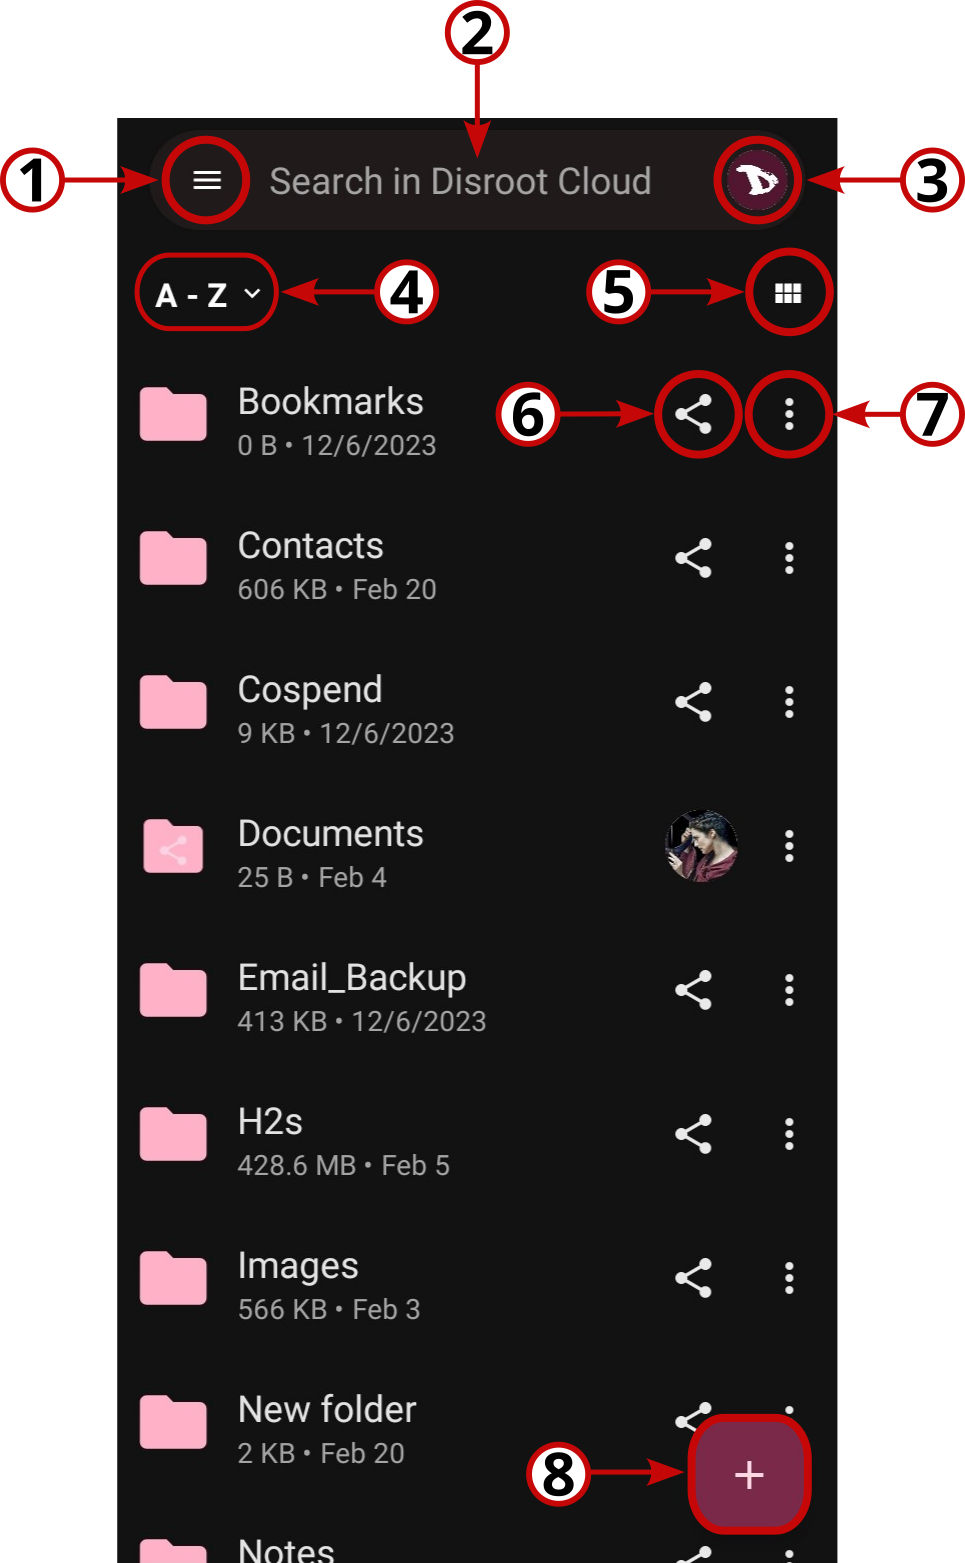
1. The settings menu
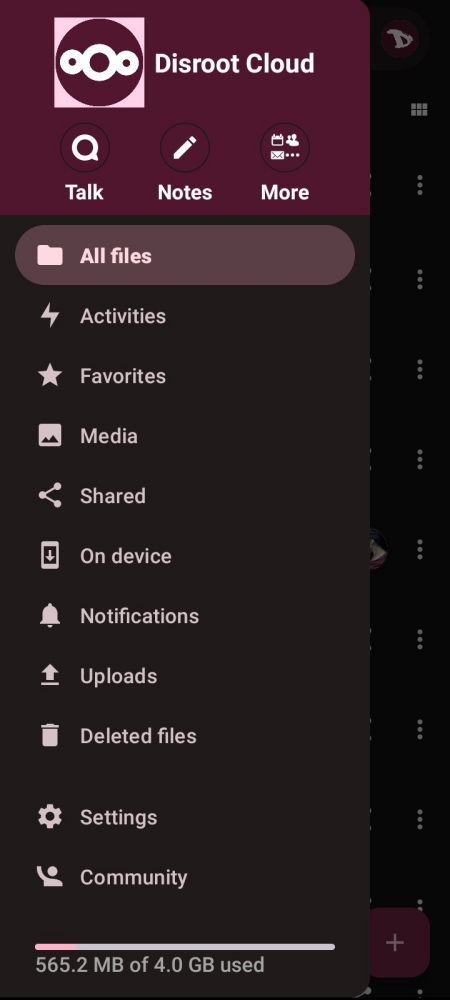
From here we can:
- check the Activities of our cloud;
- quickly access to our Favorites;
- access and manage our Media files;
- see and manage our Shared files and folders;
- check the files stored On device;
- check our Notifications;
- see and manage our Uploads, the files we uploaded from the device;
- check and manage our Deleted files.
At the bottom of this menu we have the Settings.
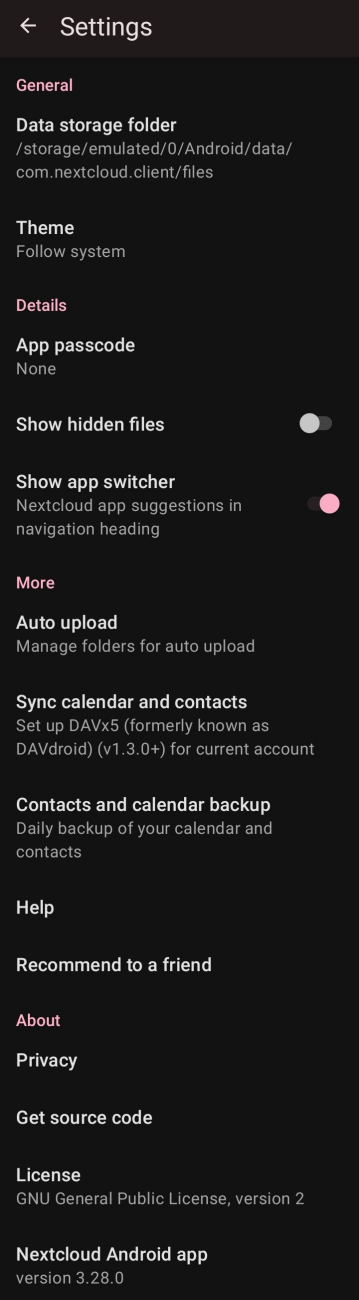
Here we have the application options such as
-
Data storage folder, the folder where our cloud data will be stored in our device.
-
Theme, to set the application theme (Light, Dark or Follow system theme).
-
App passcode, to protect access to our Nextcloud mobile app. By enabling it we will prevent anyone with access to our phone to open the app and browse our cloud storage. Keep in mind that when enabled, we will be asked for the code every time we start the app and every time we upload a file from our mobile (files, photos, etc.).
-
Show hidden files.
-
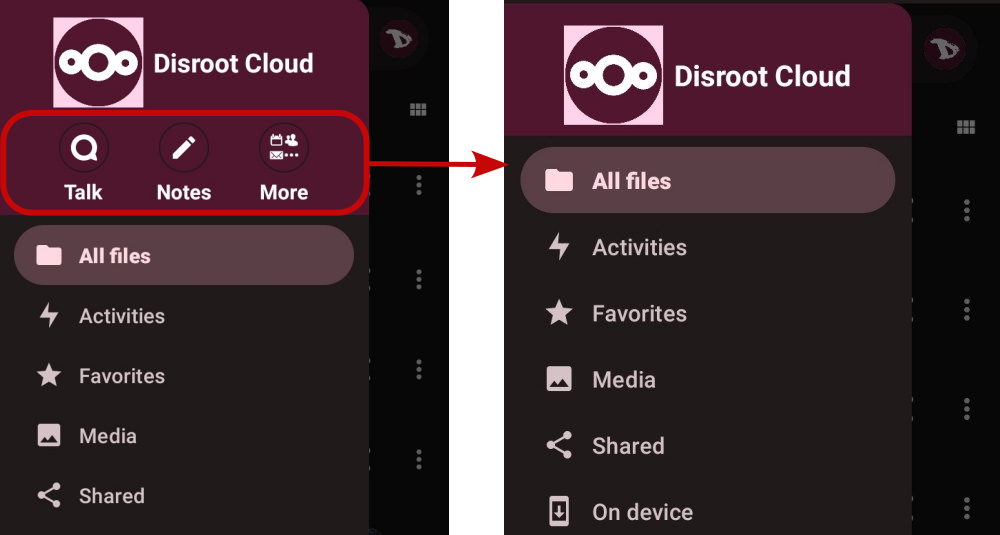
Show app switcher, enable/disable the Nextcloud app suggestions we see on the top of the Settings menu.
-
Auto upload, to set and manage folders in which when we save/add any file inside them, it is automatically uploaded to our cloud.
-
Sync calendar and contacts, to setup DAVx⁵ for the current account. If we do not have it installed, the app will try to open our app store of choice so we can do it. To learn how to setup DAVx⁵ we can read the tutorial about it.
-
Contacts and calendar backup, to enable/disable daily backups of them.
-
Help, a shorcut to the Nextcloud app support page for Android.
-
Recommend to a friend, to invite someone to use the app in their device.
-
Privacy, Get the source code and License are shortcuts to the Nextcloud Privacy policy, its source code repository and to the GNU GPL license page respectively.
The last option in this Settings menu is Community, to learn how to contribute to the app project.
2. The search tool
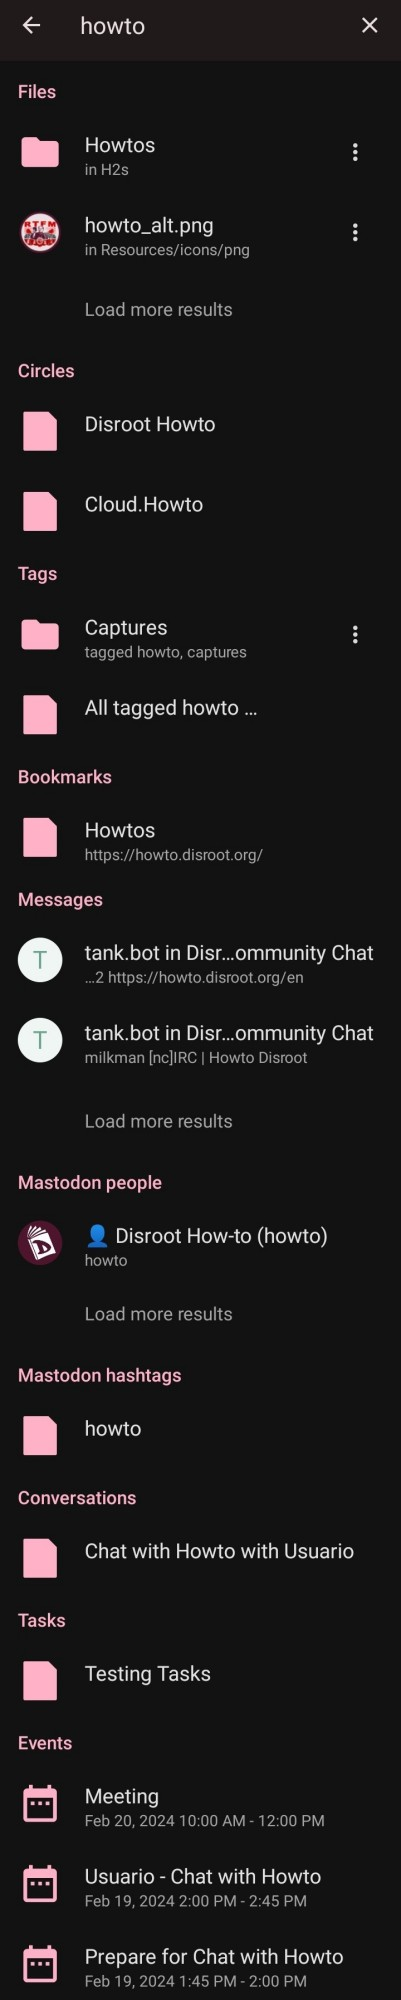
If we type something in the search field, the app will display all our files, circles, tags, bookmarks, messages, people and tags from our Connected accounts, tasks and events related to the term we are searching for.
3. The account manager
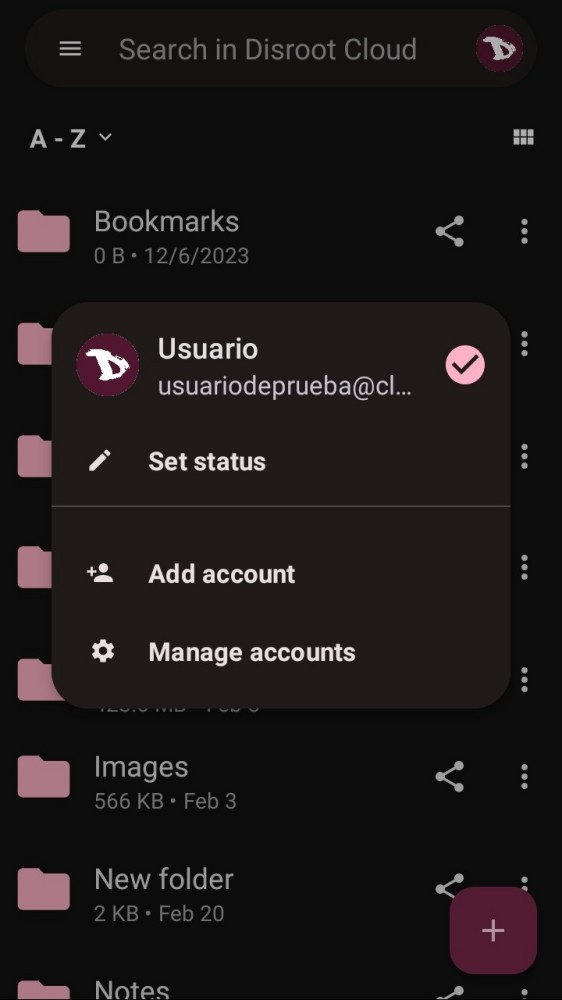
Here we can set our online status and add, switch or manage accounts.
4. The "sort by" option

To select the way we want our files and folders to be sorted.
5. The toggle view button
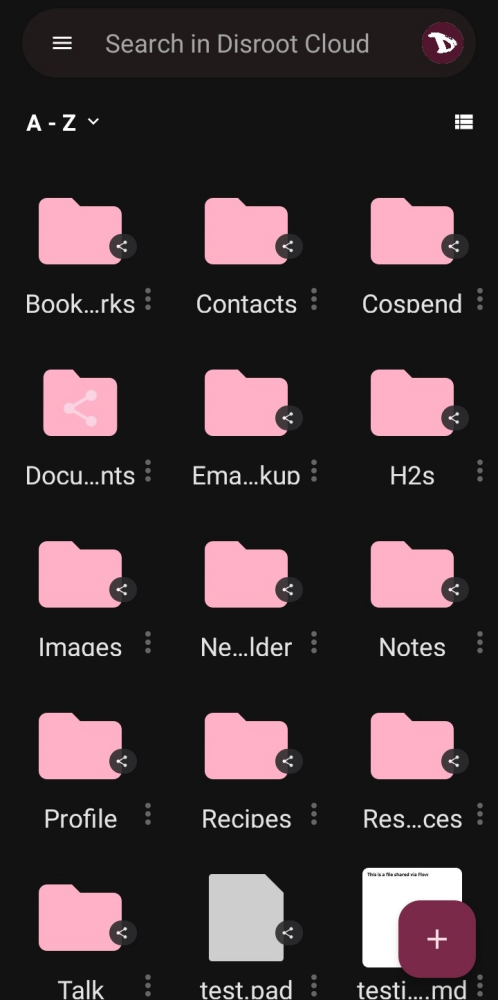
To toggle between the list and grid view of our files.
6. The sharing options
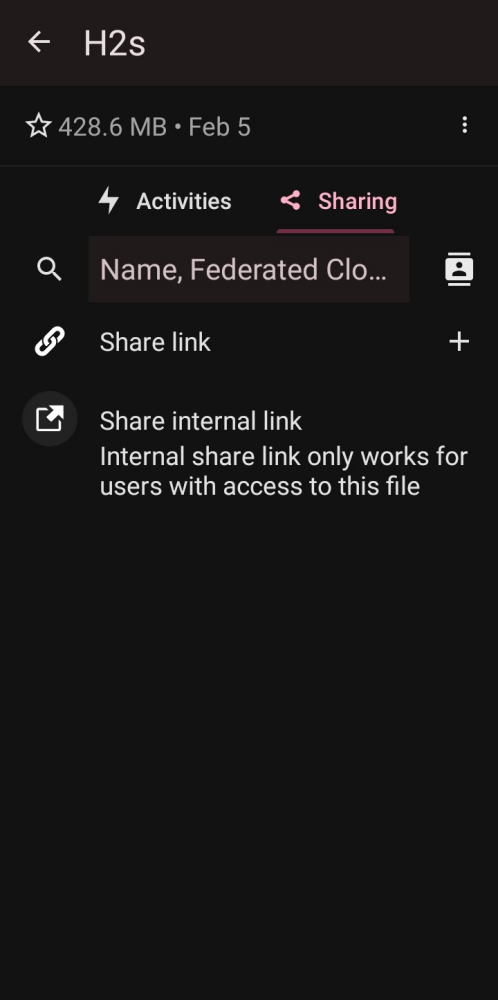
These options work the same way as in the web interface. We can share files or folders to anyone via a public link URL link or with other people that use Nextcloud (even if they are not Disroot users).
To share a file or folder we can either tap the share button on the right of an item name or by doing a "long press" on it and then select one of the "Sharing" options. We can also decide whether we allow others to edit shared files, set an expiration date or protect them with additional password.
7. The file/folder options
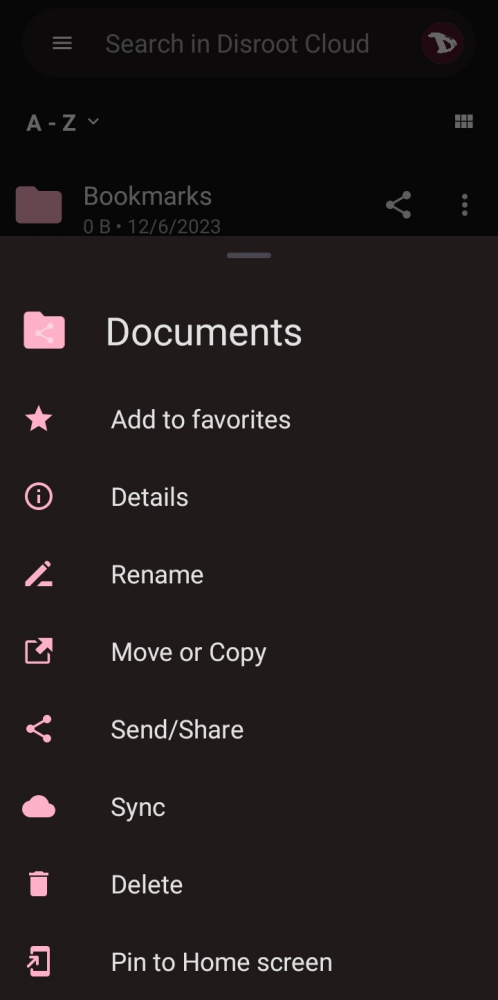
By tapping the three-dots icon, we access the following options:
- Add to favorites
- Details
- Rename
- Move or copy
- Send/share
- Sync
- Delete
- Pin to Home screen
8. Uploading and creating options
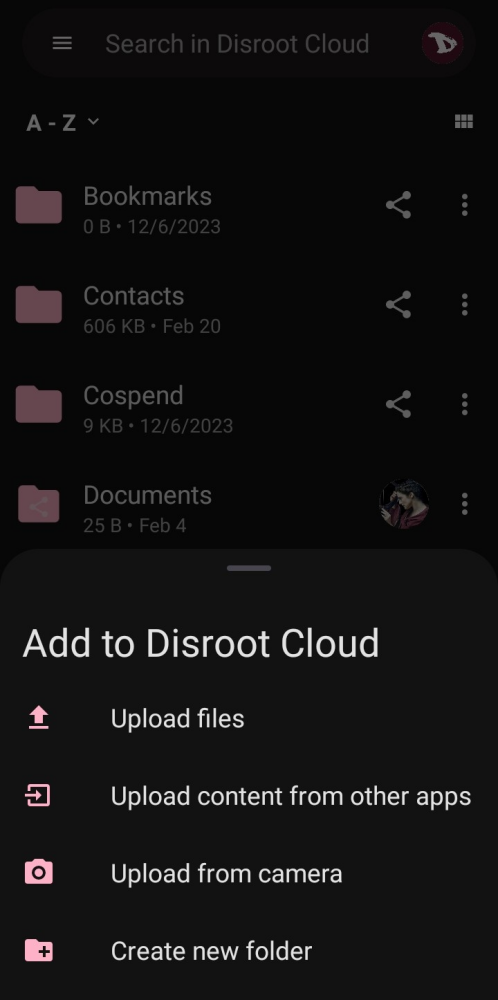
From this menu we can upload files to our Disroot cloud or create a new folder.
